Make Your Boat 1,000 Times Better
You have 1,000 minutes and a budget of $1,000. Ready, Set, GO!
Could you really make a boat a thousand times better, with a mere $1,000 and 1,000 minutes of time? I didn’t know. What I did know was that when my boys Max and Dave hit high school, I had given them a firm promise: "Make honor roll, and I’ll find us an inexpensive, easy-to-operate boat that the two of you can take out fishing and crabbing. On the first day of summer break, you’ll be free to roam the river on your own."
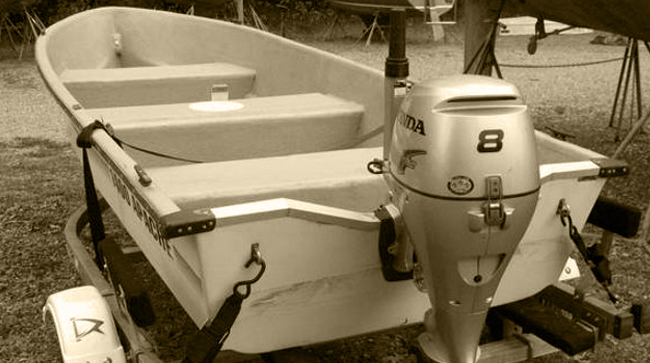
Here's the skiff before we started work on it.
Though I didn’t know it when I made it, that promise would force me to find the answer to this thousand-dollar question.
A’s and B’s followed, and over the winter, many dinner-table conversations revolved around all the fish they’d hook and the crabs they’d net when school let out. Unfortunately, my search for the ideal boat didn’t go quite as well as their grades. In fact, it was fruitless right up until the last week of school, when I finally found a 14’ skiff with an outboard and a trailer at just the right price. I brought it home Sunday around noon.
There was just one problem: the boat was completely barren. Electronics, rodholders, a battery and bilge pump, bottom paint, and a few other odds and ends all had to be taken care of. This boat needed to be a thousand times better before we could put it in the water.
As I wolfed down lunch that Sunday afternoon, I figured that if I dove right in and plugged away at it the next few evenings after work, I had 16 daylight hours—about 1,000 minutes—along with my $1,000 budget, to keep my word. With the boys' help it might just be possible, but there was no time to waste. Ready, set, GO!
The Bottom Line
We decided to start by painting the bottom, so we’d be able to work on other jobs while the paint dried. Call it marinized multi-tasking. With the two 14 year old boys pitching in, rolling the boat was a snap. While they sanded the bottom I made a run to the store to get bottom paint, rollers, brushes, tape, and other assorted supplies. Fortunately the boat had been painted before and we knew we’d only be leaving it in the water for a few weeks at a time between haul-outs, so all we needed to do was to slap a fresh coat on the bottom.
As Max and Dave rolled out the bottom paint, I broke out the most expensive of “assorted supplies” I'd just bought: a Lowrance Elite 7 HDS fishfinder/chartplotter. Maybe the $650 investment was a bit much for a 14’ skiff, but for my tired eyes to see the digits and details I needed the relatively large seven-inch LCD screen. And I wanted the boys to get some experience navigating with a real GPS on their own. It would, however, take several hours to install, and the boat was still upside down, so I set it aside for the moment.
Fortunately, installing the transom-mounted fishfinder transducer was a pretty easy process: locate a good spot by looking for an area where the boat's bottom is smooth and uninterrupted by strakes, assemble the transducer mount, and hold it in place so the bottom of the “puck” is even with the bottom of the boat. Center the screw holes in the bracket (so you’ll be able to adjust it up or down slightly and fine-tune the transducer’s placement after the mount is installed), mark them, and drill pilot holes. Goop the screws with 3M 5200 Adhesive/Sealant, drive them in, and then… wait.
With the boat upside down and the paint still wet we’d hit an impasse, because the transducer installation was the only thing we could work on until the boat was upright again. Even though sunset was still two hours away, we were done for the day. Yippee—plenty of time left to mow the grass.
Improvements: Bottom painted, fishfinder transducer installed
Time Investment: Five hours
Time Lost: Two hours
Financial Investment: $760 (electronics, paint and supplies, 3M 5200)
T - 3 days
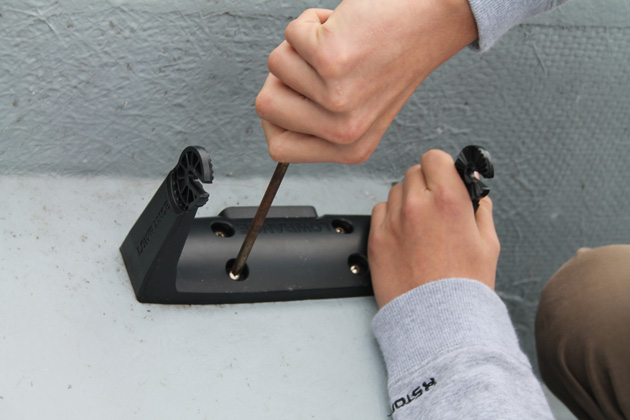
Binacle-mounting the fishfinder was a fairly easy job... a lot easier than the next one we had to tackle.
Monday I left work a bit early to register the boat. Then we jumped right back into the job with three hours of daylight left—and a firm commitment to postpone dinner until the sun was down. After rolling the boat back upright again, I got busy finishing the electronics installation. This meant drilling pilot holes and screwing down the binnacle mount for the main unit, and screwing in wire-support loops for the transducer and power cables. The boys, meanwhile, worked on mounting the battery box. Neither job was complex, and neither took very long; within 90 minutes, we were ready to move on to the next task: mounting the bilge pump.
This would prove to be one of the most difficult jobs, because we couldn’t use any old pump. If you’ve ever had a boat that didn’t bail, you probably know the challenge: standard bilge pump float switches don’t kick on until there’s standing water in the boat, and they never dry it completely. Fortunately, I’d found the Whale Supersub a few months earlier. This cylindrical pump sits face-down and can lay in a keel drain. With the integrated solid-state water sensor/auto switch, it would actually keep the boat dry.
The problem was mounting it. As is the case with most uber-simple skiffs, the lack of a raised deck leaves you with nowhere to secure the pump’s mount. Drill down, and you go through the boat’s bottom. Move the pump aft to the transom, and it doesn’t reach the keel drain. We burned the rest of our precious daylight positioning and re-positioning the pump, trying to decide where and how to best mount it.
Improvements: Electronics and battery box installed
Time Investment: One and a half hours
Time Lost: One and a half hours
Financial Investment: $0
T - 2 days
As we huddled for a team meeting Tuesday afternoon before going back to work, we still didn’t have an answer as to how we’d mount that pump. Instead of losing more time, we decided to move on to the fishing rod holders. I had purchased four side-mount holders, which would be ideal for attaching to the molded-in bench seats. And then Dave had a brainstorm: if we mounted them exactly the right distance apart, we’d also be able to use the rodholders as a slide-in mount for our trot-line arm (used to hold a line next to the boat, for crabbing). I gave the boys a tape measure, 16 screws, and the drill, and told them to get busy on those holders—measure twice, drill once—while I went back to puzzling over the bilge pump.
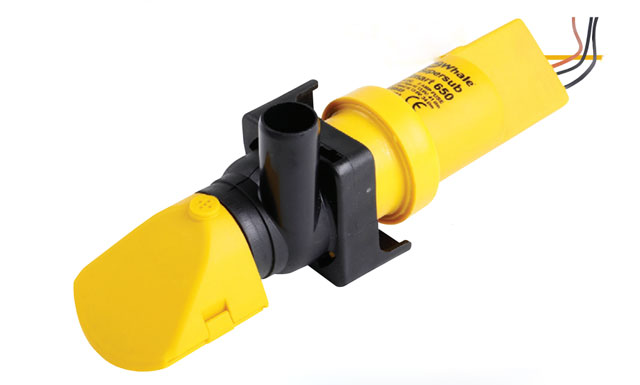
The one-of-a-kind Whale Supersub fits into a keel drain, and eliminates nearly all of the standing water common bilge pumps leave behind.
Before they were half way through the job, I had a brainstorm of my own. If I could extend the top of the keel drain where it ran out from under the aft bench seat, I could slide the bilge pump under the extension and mount it down from above. I searched through the shed for an appropriately shaped and sized piece of plastic, an oddball bracket, or fiberglass pieces-part that would fit the bill, and had a Eureka moment when I saw an old tacklebox. The strong yet flexible slide-out plastic dividers would be perfect.
By sunset, the boat had rod holders and a bilge pump.
Improvements: Rod holders and bilge pump installed
Time Investment: Four and a half hours
Time Lost: One and a half hours
Financial Investment: $225 (Bilge pump, rod holders)
T -1 day
We reconvened at the boat Wednesday, with just three hours left to complete the project—tomorrow would be their final day of school. Fortunately, the remaining list of tasks was not long. We needed to mount two cup-holders, put the new registration numbers on the hullside, and wire the fishfinder/GPS to the battery...
Wait a sec—what battery? Okay, I’ll admit it, I cheated a bit on this count. I had a marine battery sitting in my shed, and since buying a new battery would bust the budget cap, I decided to re-purpose the old one.
I gave the boys stencils so they could paint on the registration numbers while I wired up the battery, and then we put on the cup-holders. Eureka! The job was complete. With a solid hour of daylight left, the boys agreed on a name for their new boat, and painted it on the transom: the Angliar II.
Improvements: Cup holders installed, registration numbers applied, name applied, battery wired
Time Investment: Two hours
Time Lost: None
Financial Investment: $12 (Cup holders)

The brothers head out for their first crabbing trip on the Angliar II.
When all was said and done, was the boat really a thousand times better? It’s debatable, but Max and Dave certainly think the answer is “yes.” With 1,000 minutes and $1,000 we took a shell of a boat and turned it into a summer of fun. And if we did it, you can too.